Friday, May 27, 2016

The Great German Slider Rises!

I know I will repeat this many times, but I am having a ton of fun working on Vera! I've been getting lots of practice on my patience although very enjoyable learning how my bus works! Since purchase I knew of Vera's broken sliding door. It wouldn't open normally, you had to pull a cord from the inside to release the latch. Once released, the door would catch again, only opening about 3 inches. 

Sorry, not that skinny, so you had to lift the sliding rail panel and dig with your fingers looking for a little lever to push. The door then would slide open, then sliding off the bus hanging half off. It was pretty pathetic but I knew I needed to fix it!

As Evil and angry as this sliding nightmare of a door can be...  after a day of messing with it I was pretty comfortable with it. 

So the reason that the door didn't open was the door was locked and there wasn't a matching key! I was able to get the handle off ok, but I could not get the locking collar off. Some have little screws you can loosen to get it off but mine didn't have one. So, I bought a new handle with lock and now the door opens!!


So with the door opening I needed work on the door catching at 3 inches. The hinge mechanism located at the back of the door where it slides is actually a brilliant design but when broken the door can be a little violent because it's so heavy! Remember when I mentioned evil and angry? 


In the hinge assembly, there is a little cam (lever) thing that with a spring twists a latch to release, and the door slides. All powered by the swing out of the door. I know sounds really confusing. In my case that little cam was broke in half. This was creating the catch at about 3 inches. With out knowing what the cam actually looked like it made it difficult to understand how it worked. I searched everywhere online for a new one but all sites listed as discontinued. I ended up finding it a the local Vintage VW junk yard here in Phoenix AZ. He only had one! The guy there has been really helpful.


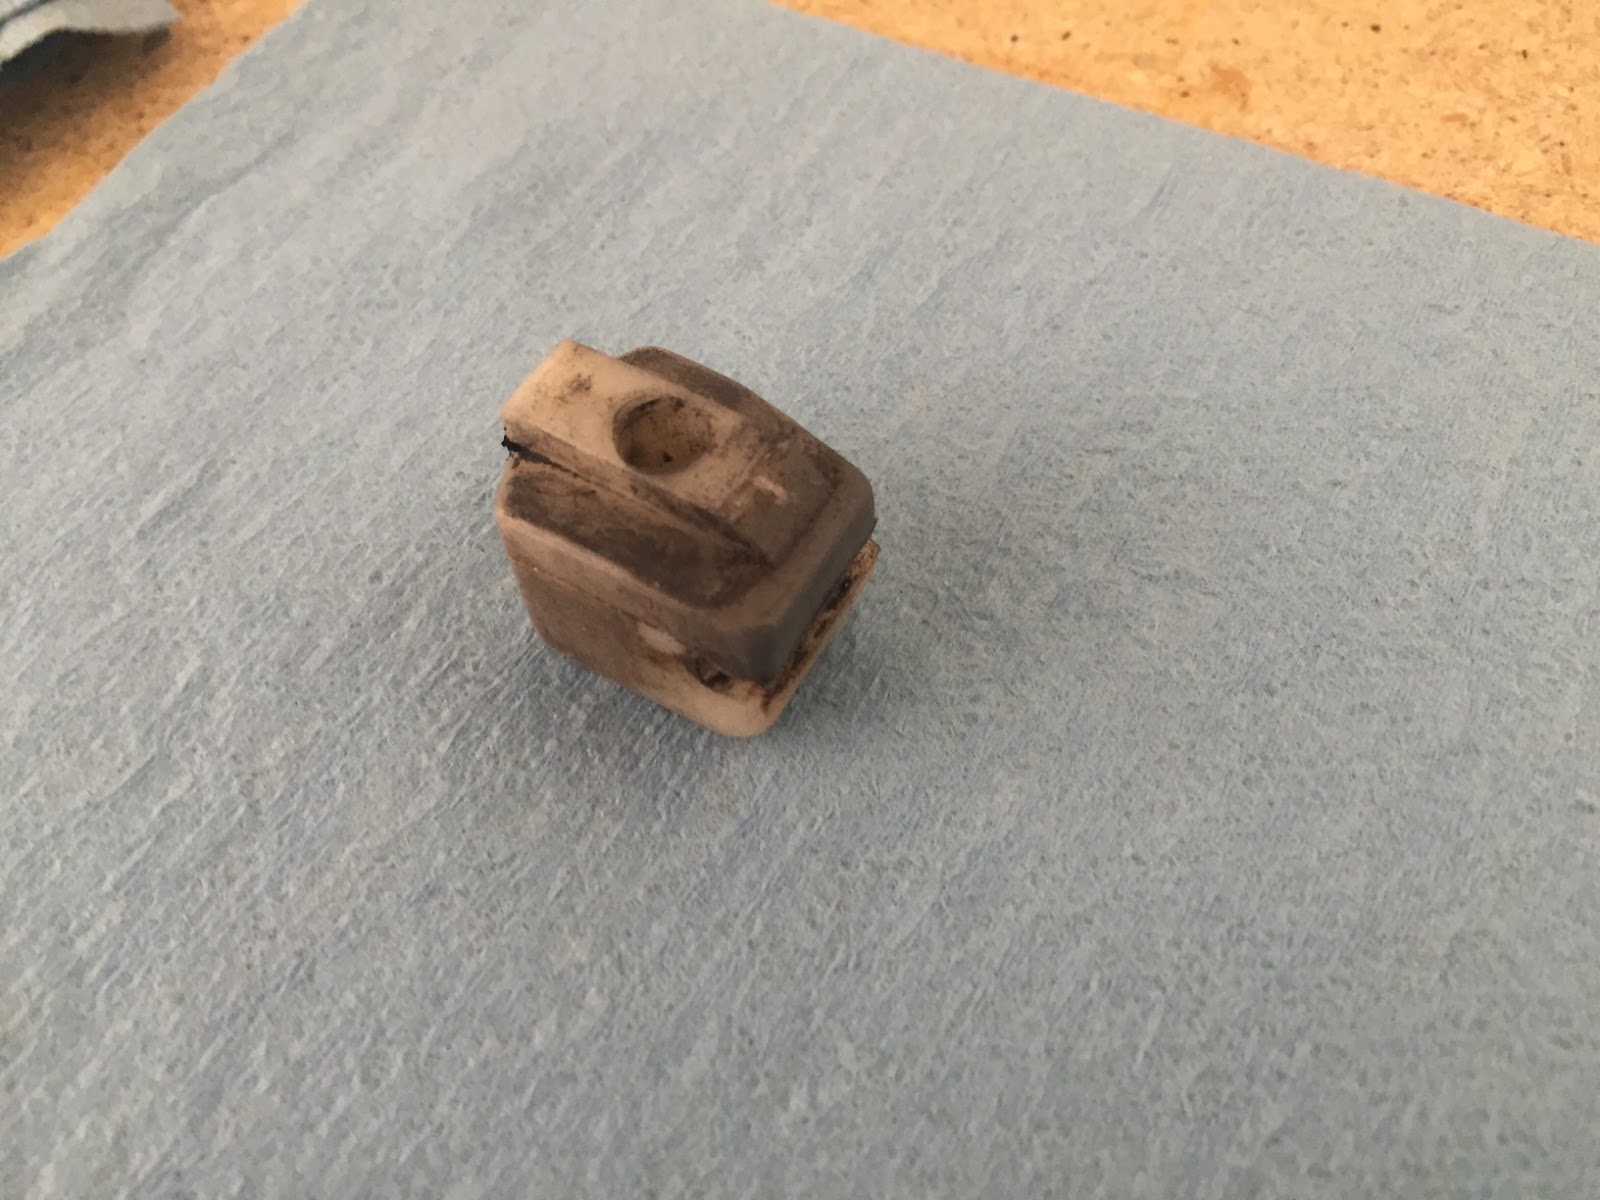
There is also a little nylon slider that helps guide the door and keep from sliding off. Mine didn't look too bad but I ordered a new one anyway. 


I also noticed the U bracket was really bent, making the door hard to slide. I tried to straighten it but it was pretty bad. I was able to find a used one with the whole spring assembly that goes in the door. at the junk yard. So I replaced the whole thing as the new (old) spring looked good!


So, whew, If you're still with me, I had my brother in law help me put the door back on. I was able to get it on alone a couple of times, but not with all the good parts on! So it was very nice to have help. I used 2 jack stands to prop it up. With a new nylon guide, newer cam, new U bracket and spring, we tested the door. It was sliding pretty good! Opening and closing, sliding ok everything was looking pretty good. Then here comes the evil and angry door again. Bam, falls half off. Fortunately, we caught it early, I've had practice haha!


Looks like I will need to fiddle with the adjustments of the rollers. I also need to replace the rail cover as its been beat up with years of the door falling off. 

This is a time when you practice patience :) You know, when I think of getting upset, I just remember I'm working on my dream. Owning a VW Bus. Plus, Life's too short so enjoy!

Roller adjustments....More to come...


Wednesday, May 11, 2016

Seeing The Light

Wow what a fun time I've been having working on Vera. There are several issues with the wiring. The problem was turn signals were blowing fuses. Since I knew nothing about VW wiring up until a week ago I was able to use a great book by John Muir to get me started. Also, the help of a few websites like thesamba.com and youtube.com I've been able to navigate the wiring pretty good. With only one problem, half of the wiring, switches etc. are missing. The stuff that is there isn't where it should be.

I first started inspecting the lenses. both were cracked and the bulb socket on the lense housing was rotted out. So I replaced both front housings, bulbs and lenses. This didn't fix the problem though. I inspected the rear lights and everything looked ok. I also replaced all of the fuses. Nothing helped. Fuses still blowing.

So, t then started checking all grounds (I could find) and fixed up a couple but the problem remained. After disassembling the switch, I cleaned it really good. I put it back in and tested, the fuse didnt blow and the signal lights came on but they wouldn't blink. With a lot of tracing wires I was able to determine the Flasher Relay was also missing! I ran down to the local auto supply store and picked up a relay. I came back and tested and they worked!

However, now the headlights weren't working. By now you might think I was getting frustrated? Haha, so would I normally but no I was pretty confident in the problem as I had learned the wiring, whats left of it. So with a replacement of the headlight relay I had working front and back turn signals, tail lights and head lights! I was pretty happy!!

One interesting thing is while removing the stereo I noticed a cassette tape was in the deck! Of course I had to pry it apart, it was a nice break from the rats nest of wires. It had Bob Marley/Tribe written on one side! Ya Mon!! So cool. Also had Backstar written on the back. I think it is another reggae band?

I suspect a pretty big wiring system was in the bus at one time. There is an extra fuse box that is mounted under the dash with all wires cut. This was probably for a stereo. There were lots of dead wires I pulled out. Probably half the harness, Things like high beams, windshield wipers, and dome light are not working.

Anyway, so on to the next project.


Saturday, April 30, 2016

These Shoes Were Made For Stopping!

I picked up some new rear brakes at Wedge Vee Dub in Phoenix. If you need any parts in Phoenix, call Paul at Wedge, they have excellent customer service!

Anyway, this is the second drum brake job I've done, the first was over 20 years ago. After several attempts of getting the first drum off, I referred to the Muir book on using a hammer to tap the sides of the drum to loosen. It worked great, however after removing I saw that the drum was severely worn. The cylinders seals were also torn and leaking. There were several broken springs as well. It looked like they hadn't been serviced in years.

I began to remove the shoes, to discover I need to loosen the Emergency Brake. Not just release the brake but actually loosen the cable at the base of the brake handle. Once loose I was able to get the shoes off.

I was very careful to remove the brake line. It doesn't look like the thing to break! Once removed, I had to spray some brake cleaner around the back plate and cylinder screw. After chipping off old brake fluid and years of brake dust I was able to remove the cylinder. The passenger rear didn't have any anti rattle pins, I did find one of the springs loose in the drum.

I saved and cleaned the e-brake arm, the brake adjusters, the cross bar in solvent. I then rinsed and scrubbed with a wire brush. The soaked in solvent for about 30 minutes. I then rinsed.

The installation on the first one went pretty good until I got to the anti rattle pins! They were just a little short making it almost impossible to compress the spring to snap in. After searching endlessly through my hoard of random junk, I checked the parts box I got with Vera. It had some longer pins! Bam, they were in. The second one went pretty good, I knew what I was doing haha. Fortunately I had extras of the anti rattle pins for the other side or I would have been stuck.

I then tighten brake at the base of the lever in the cab.

I then bled topped of the Brake fluid and bled both brakes.

Initial test drive went good. The e-brake works good too.

It was a fun adventure!


Wednesday, April 27, 2016

A New Beginning

Welcome to Vera the Bus Blog! 

This will document the process of taking and old worn out vintage VW Bus and getting her road worthy. We will also be updating her paint and interior!

Vera the Bus is a 1971 VW Transporter. There is currently little known about her history, but that she was born in August of 1971. She made her first trip from Montana to Hollywood, CA that year. Since that time it's a mystery. What is apparent is that she has been busy!

Here are some of her current issues from living a long life as a bus:

Rear Brakes: Completely worn out. (Need Replaced)
Turn Signals: Blowing fuses (Need Replaced)
Sliding Door: Needs new bushings and possibly new hinge.
Window Seals: Rotten (Need Replaced)
Bumpers: None. Need to buy some.
Paint: Needs New Color!
Body: She has her share of bumps and bruises.  Some need fixed.


I'm very excited about making these repairs and upgrades so that Vera the Bus can start her new life! That's it for now. Stay tuned for the progress!

Ty